When we interviewed the retiring Chair of the BPA Riggers’ Subcommittee, Paul Applegate, we asked him what wound him up about how people treat their kit. What didn’t they know that he wished they did?
His answer was immediate and passionate. “Today, you’ll flightline someone, they’ll have put a piece of kit on their back and you’ll ask them what’s in it. They’ll be able to tell you all about the weird and wonderful kit they’ve got in the bottom, and how small it is. Then you’ll ask them what’s up top and they don’t know.”
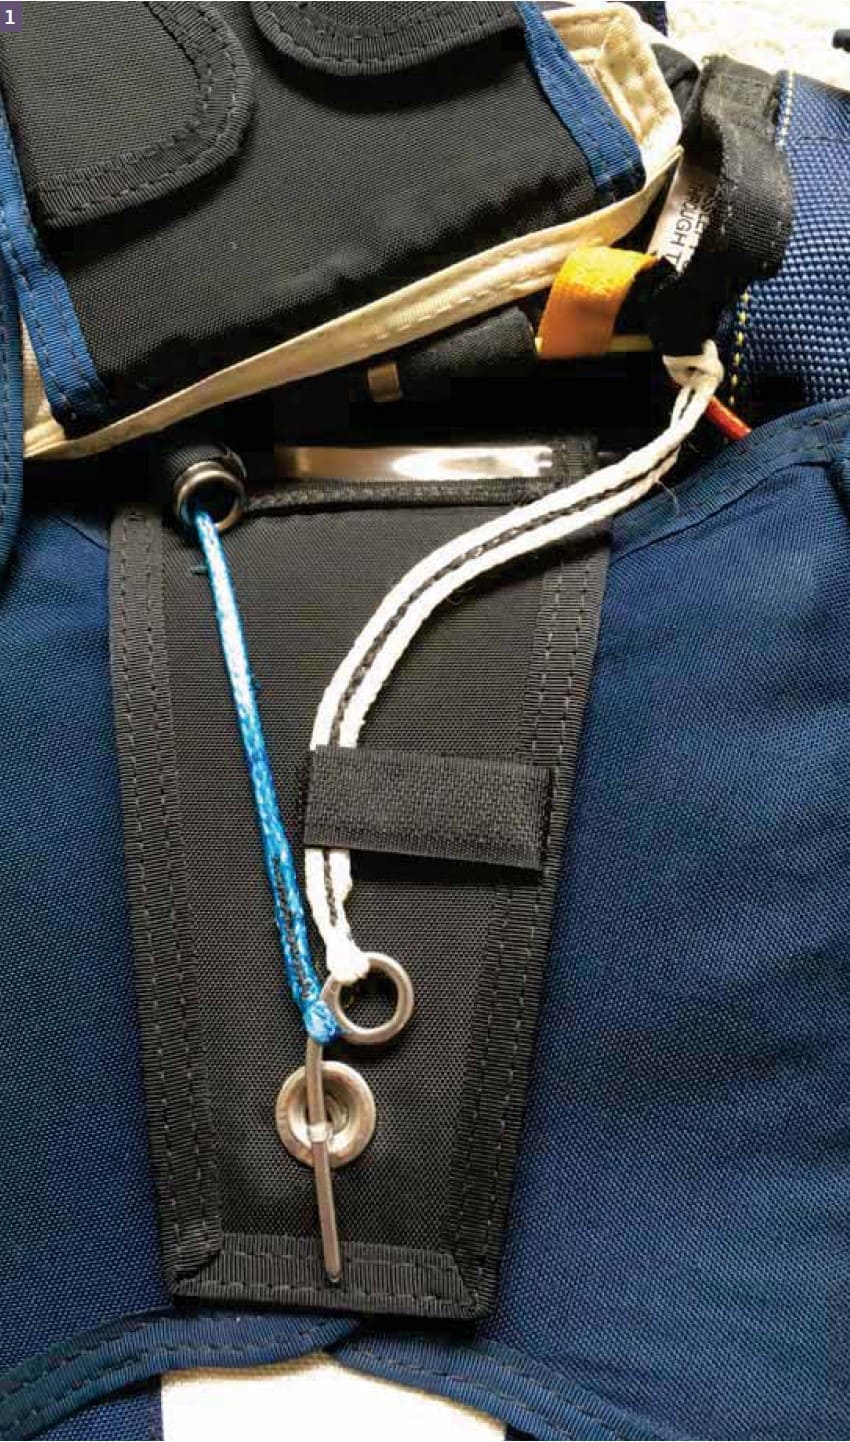 1: This is the view under a reserve flap on a Vector V3. All reserve containers have some form of ripcord and pin, but there are many different types on the market. The most common is a metal ripcord with a straight pin attached firmly (‘swaged’) to the end, so this blue Spectra ripcord and separate pin was a break from that tradition when it was first released. The reserve container can be opened in several ways – either by manually pulling the reserve handle which in turn pulls on the ripcord and pin, by the Reserve Static Line (RSL) pulling the pin or by the Automatic Activation Device (AAD) cutting the reserve closing loop.
In this photo, one end of the RSL can be seen as black webbing disappearing over the jumper’s shoulder towards the right riser while the other end is the white cord with black stitching that is attached to the reserve pin. All RSLs work by using the departing riser to pull the reserve pin out, but this one also goes two steps further with both a Collins Lanyard and a Skyhook. The Collins Lanyard (the yellow webbing around the yellow cutaway cable) cuts away the other riser, which would be desirable in the case of a broken RSL-side riser. The Skyhook directly pulls on the reserve bridle (see the red cord that disappears into the reserve container).
When flightline checking another jumper, make sure that the reserve closing loop is in excellent condition (without touching it!), the pin is securely all the way in, the AAD is turned on and that everything looks as it should for the particular kit you are checking. If in doubt, ask.
2: Inside a reserve container. There are more similarities than differences with the main container. The reserve canopy is packed inside a bag, like the main, but the bag is not attached to the top of the reserve canopy – hence the name ‘freebag’, as it falls to earth separately after deployment. Also notice the closing loop coming through the middle of the bag, which is normal for reserves, and the long, wide bridle.

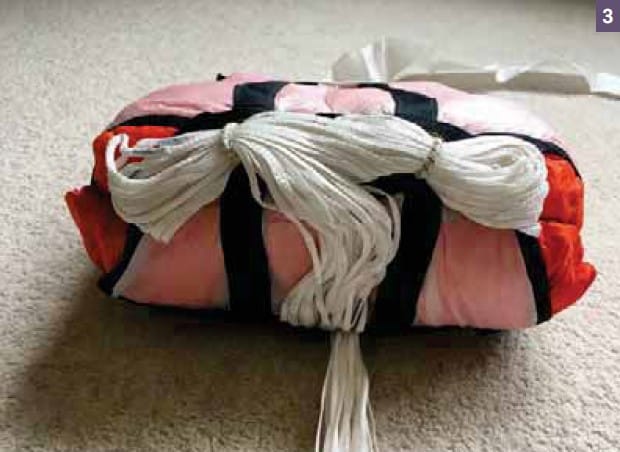
3: The mouthlock bungee is made from elasticated fabric and is known as a ‘safety stow’. Reserves can stay packed for up to six months in the UK, and rubber would perish so it is not suitable. The two mouthlock stows are held in place by opposite ends of the same continuous elasticated loop. This is so that, in the case of a problem on deployment, only one side needs to release and it will also release the tension on the other side. The rest of the lines are s-folded neatly into a pouch, similar to semi-stowless main deployment bags.
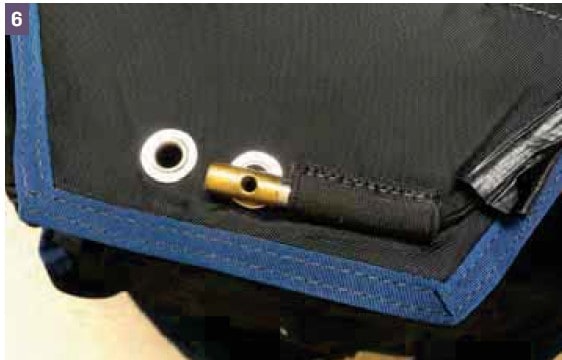
4: Open and empty reserve container, showing internal channels for the AAD and reserve closing loop in the middle.
5: With AAD removed from its pouch to show routing. AADs have a processing unit containing the electronics and power, a cable leading to the cutter and another cable leading to the control unit (the only bit you can see once the reserve is packed and container closed).

6: AAD cutter. The placement of the cutter depends on the container. Some are mounted on a flap above or below the reserve pilot chute (e.g. Vector, Icon) and some are mounted right down inside the reserve tray (e.g. Javelin, Teardrop). All work on the same principle, though: the reserve closing loop passes through the cutter so that if the speed and altitude are ever within dangerous parameters as set by the AAD manufacturer, the cutter fires and the loop is cut, initiating reserve deployment.
7: Another key difference between main and reserve deployment is the pilot chute. Except on some student kit, all main pilot chutes are ‘throwaway’ and fit easily in the main BOC (bottom of container) pouch. By contrast, reserve pilot chutes are ‘spring-loaded’ and have a very powerful piece of coiled metal stitched to their inside!
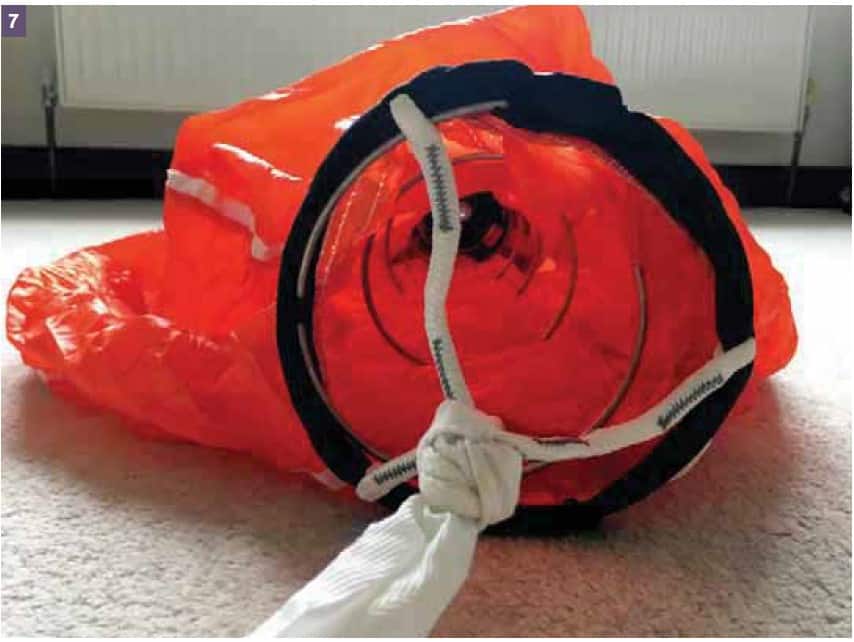
This is harder to pack, but has the deployment advantage that the spring fires the pilot chute well away from the jumper and hopefully into clean air from where it can extract the reserve quickly. Reserve pilot chutes need to work in less-than-ideal conditions, such as when the jumper is low and unstable or the main canopy is entangled. Remember that extra-long, extra-wide bridle too? That’s for even more drag and the idea is that, if the reserve pilot chute somehow gets entangled, the reserve canopy could still come out of the freebag because the bridle is more than twice as long as the reserve suspension lines.
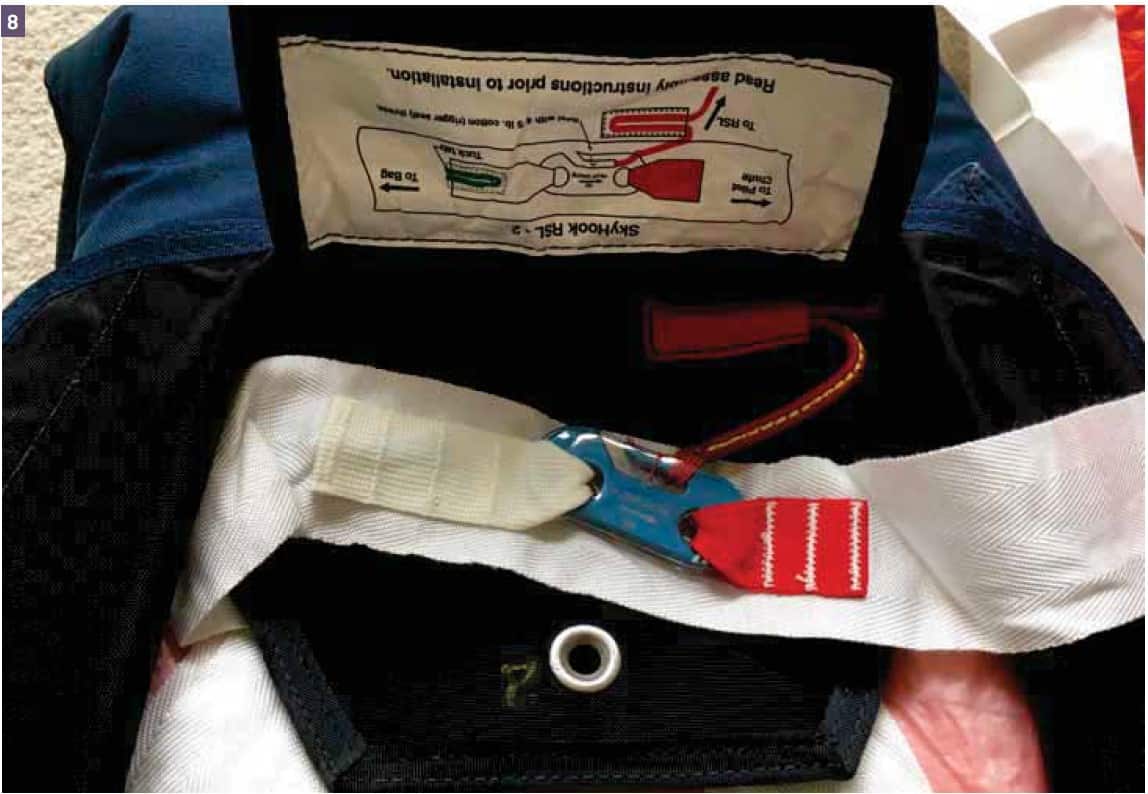
8: Skyhook: the bit you don’t see. The other end of the red cord attaches to the RSL (see image one). The Skyhook itself is stitched securely to the reserve bridle, close to the freebag. The red cord is looped over the hook such that the pressure of it pulling on the bridle will transfer the full power of the departing main risers to extract the freebag and minimise the time between cutting away the main and being at line stretch on the reserve. However, if the malfunction was a total (e.g. could not find or pull the main pilot chute), the reserve bridle will ‘win the race’ instead of the Skyhook, the red cord will simply slip off the hook and a normal reserve deployment will ensue.
Photos by Apples
 First published in the April 2019 issue of Skydive the Mag.